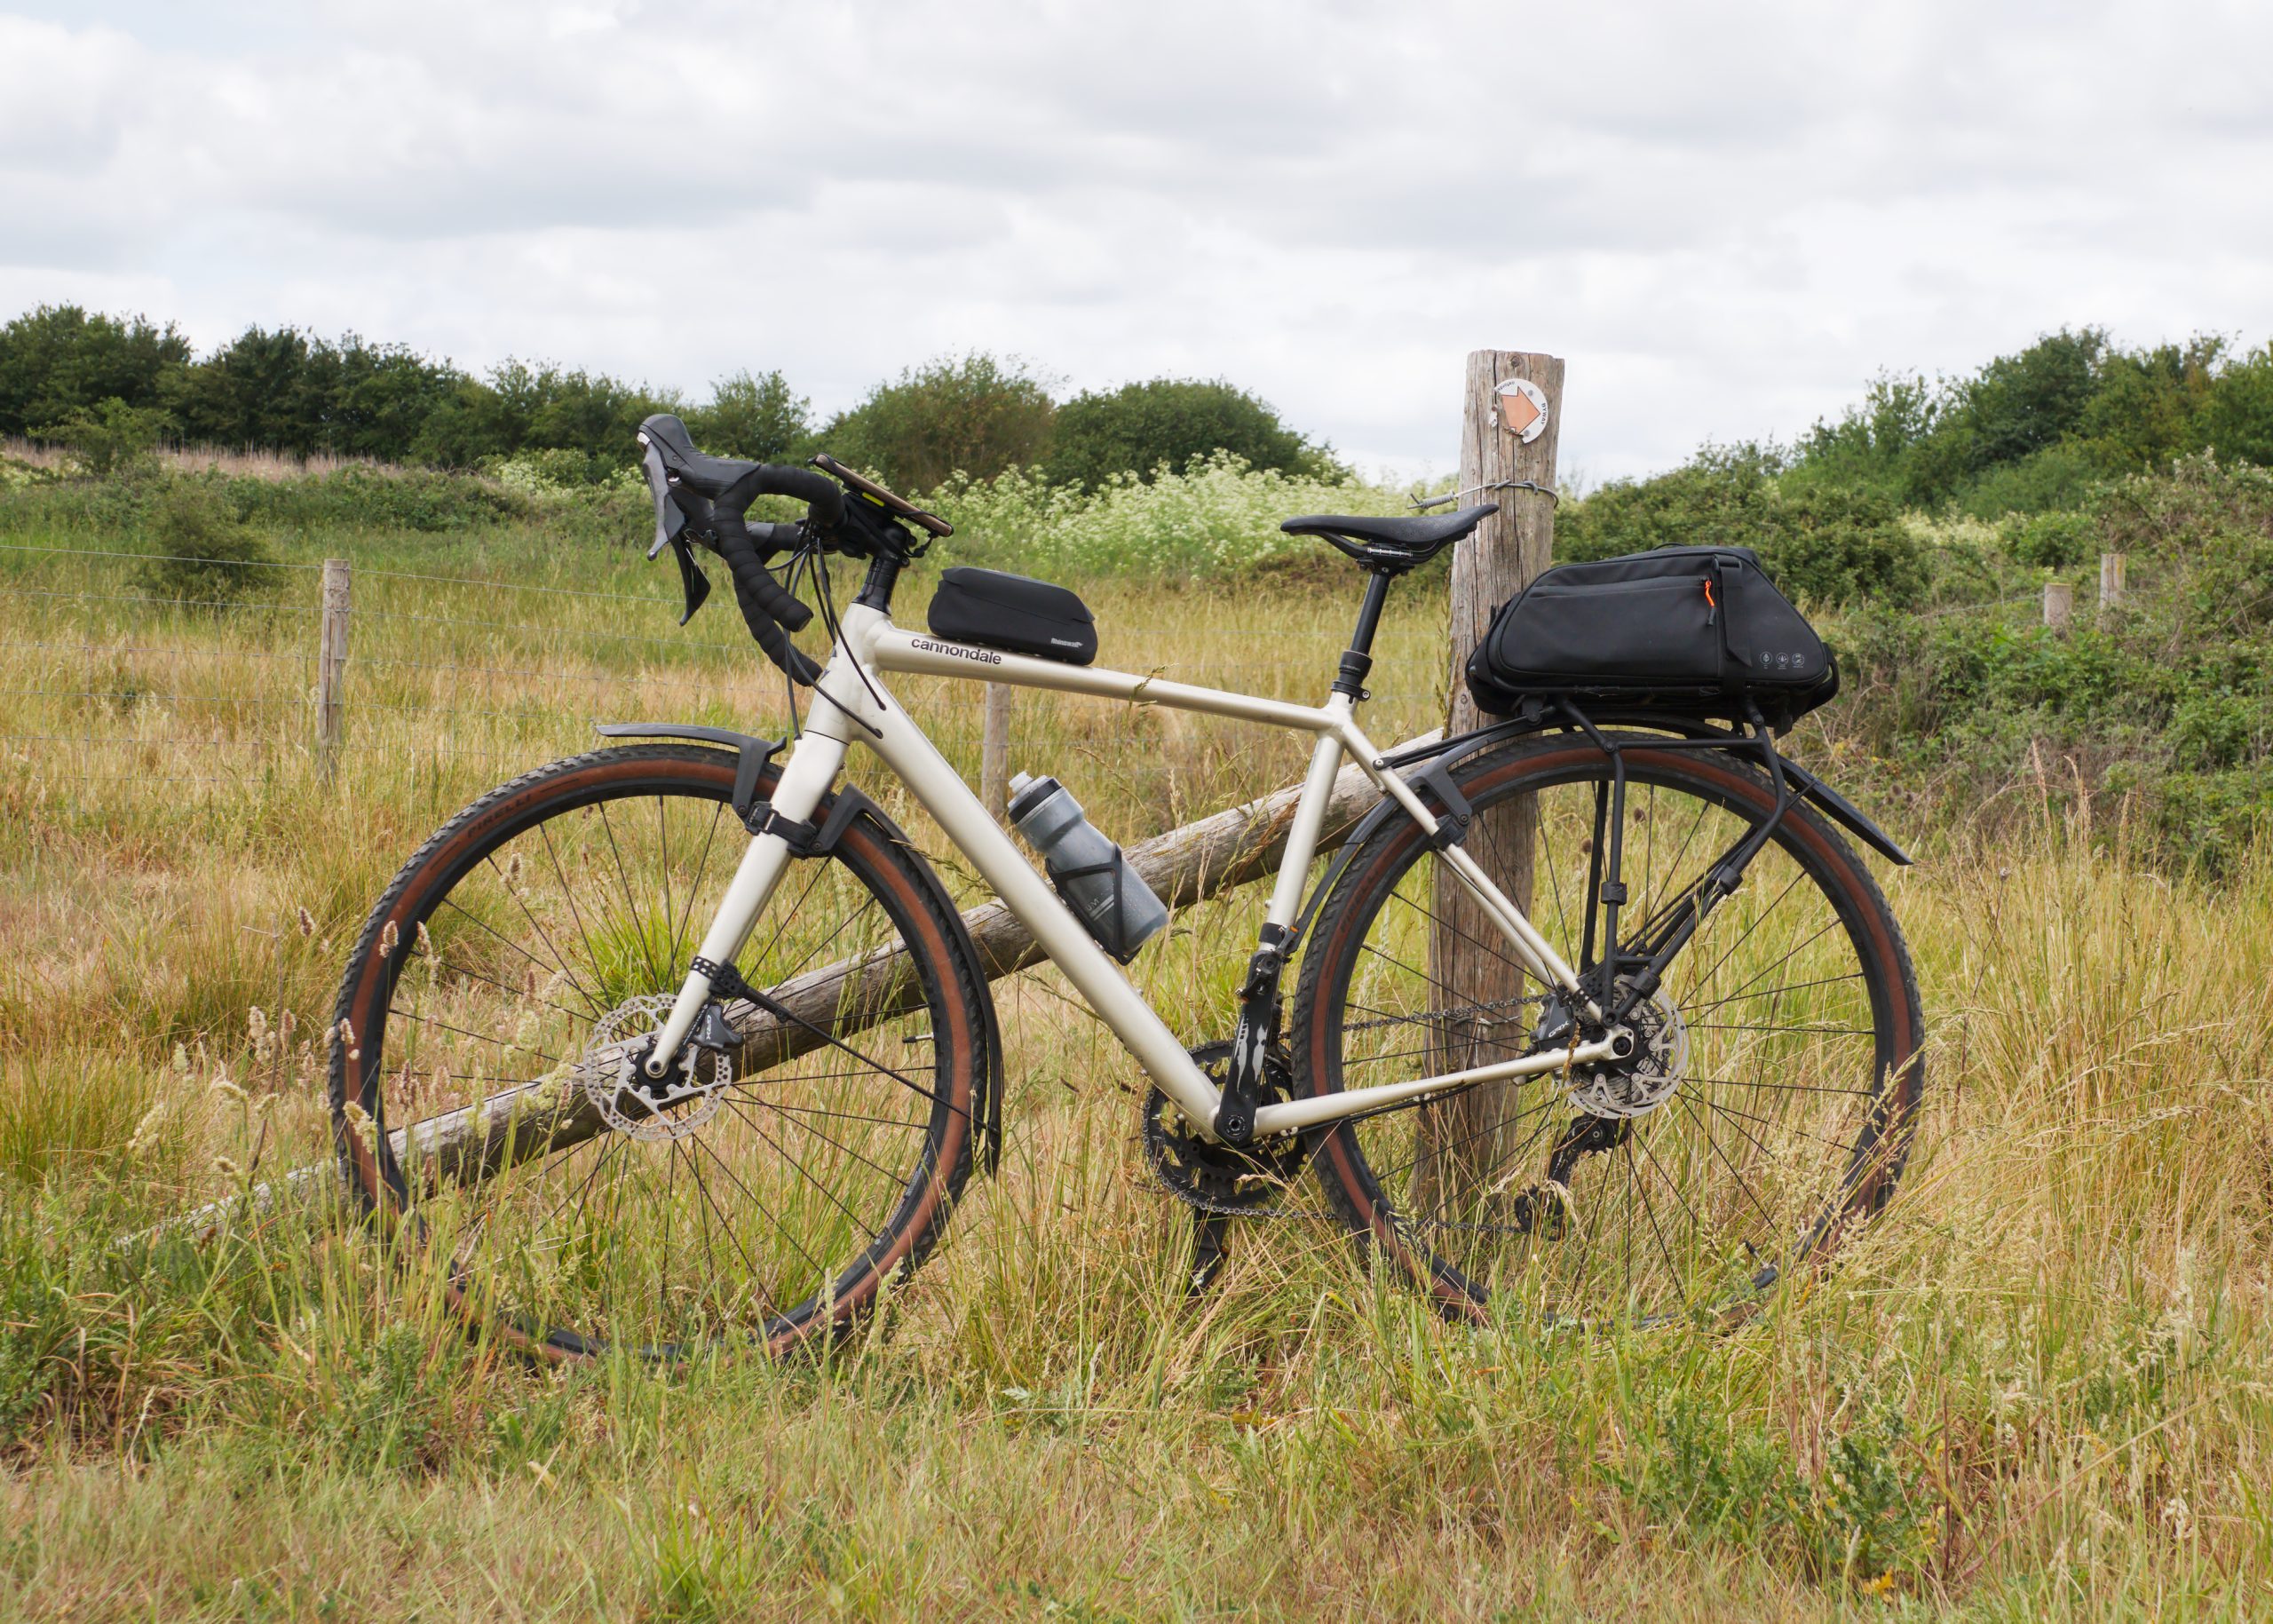
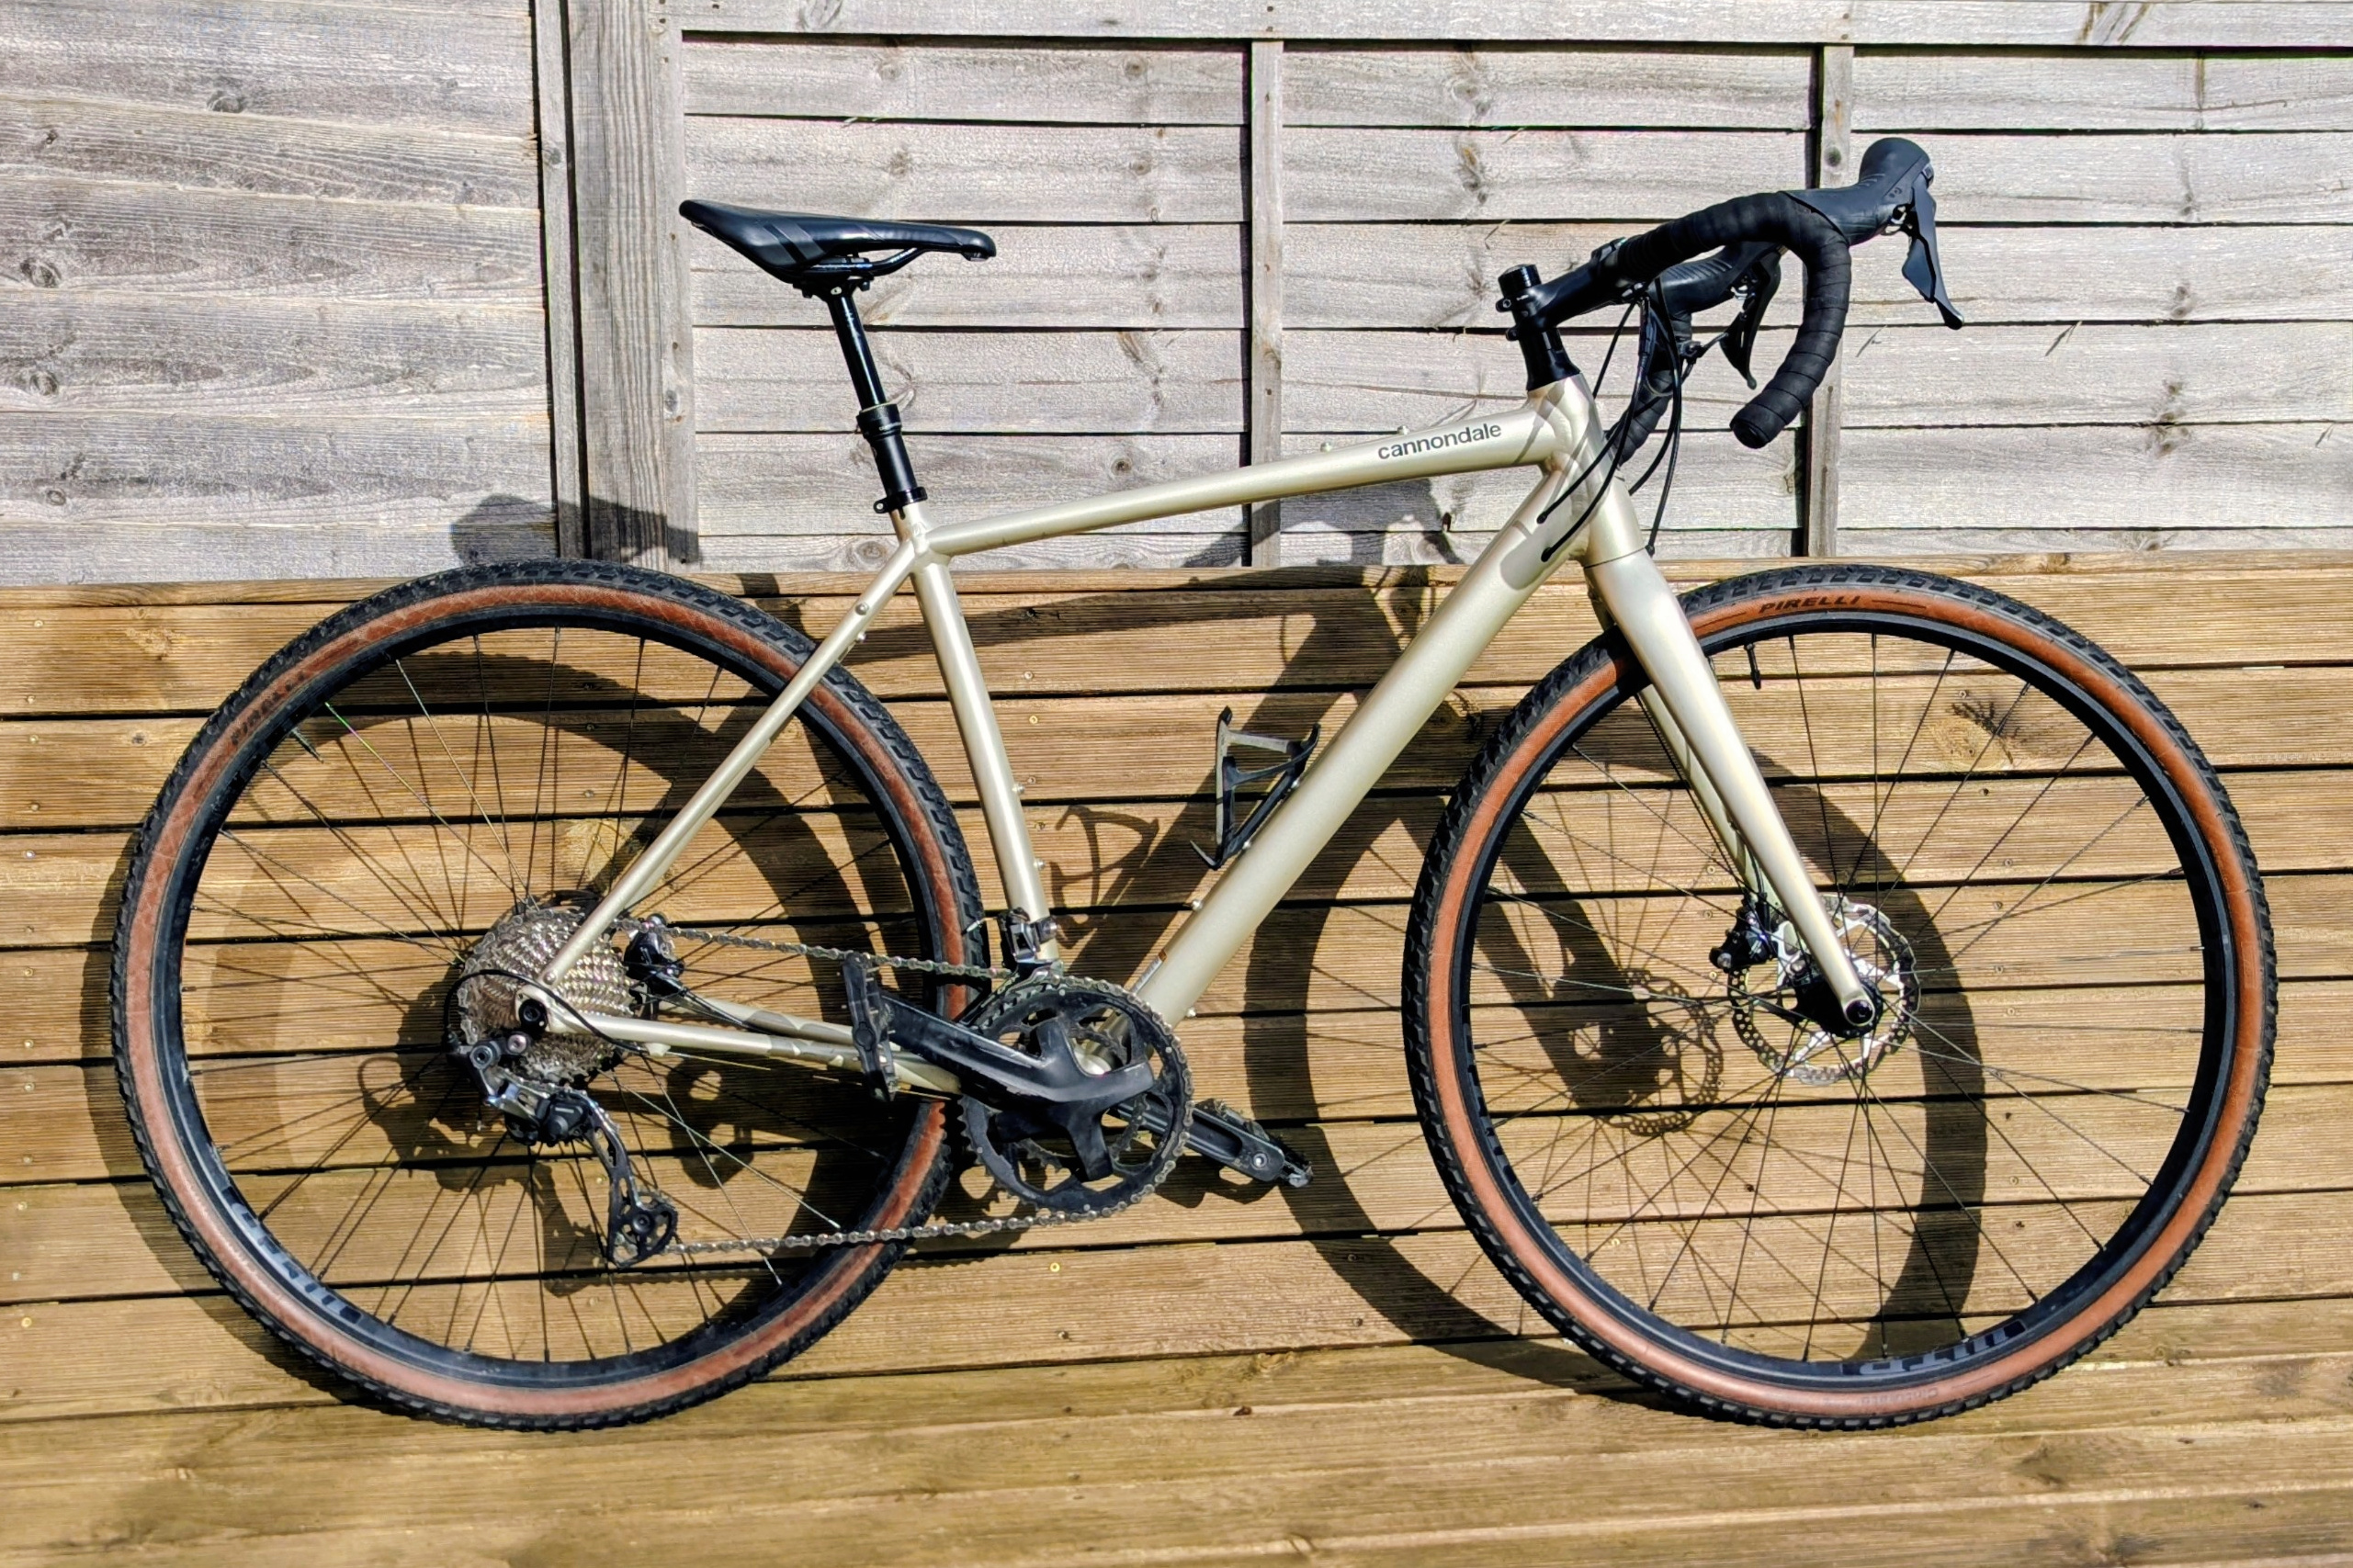
The Topstone 0 was the highest specified version of Cannodale’s alloy-framed gravel bikes in 2021/2022 with an RRP of £2400 (they also had a pricier carbon-framed Topstone Carbon range at the time with several different levels of components).
The Topstone 0 is based on their SmartForm C2 Alloy Frame with a full carbon fork. The groupset is Shimano GRX 800 (gravel equivalent of Ultegra) with 2×11 and hydraulic disc brakes, but with the crank, chainrings and bottom bracket by FSA (Omega AGX+ crank). Mine is in MD size (which affects stock handlebar and stem sizing). The handlebar is a 420mm Cannondale 3 alloy drop bar with a 16 degree flare and the stem is an 80mm Cannondale 3 alloy (31.8mm, 7 degree).
I purchased this bike second-hand in March 2026.
Modifications/Additions
- Pedals
- The previous owner sold the bike with Shimano Trail Flat pedals which have 9 pins so trainers grip quite well even when damp. I rode with them for a while but have been looking to try SPD so I have swapped them for some Gewage dual-function pedals (flat with pins on one side, SPD on the other).
- Tyres
- 40mm wide Pirelli Cinturato Gravel M tyres with tan sidewalls. Currently I ride mostly paved surfaces so a slightly more road-oriented tyre might suit me better, but my intention is to explore more bridleways and the Gravel Ms will suit those.
- Seat post
- The frame has internal cable routing and is “dropper compatible” meaning it has a spare route for a wired dropper remote. A previous owner fitted a Crankbrothers Highlight XC/Gravel 27.2 Dropper post with 80mm of travel.
- Saddle
- The previous owner sold the bike with a Selle Italia X3 Boost but after doing several 20 mile rides I was not convinced it was quite right for me (even after adjusting the seat angle and height). After trying a couple of different options I’ve currently got a Mixed 5D fitted.
- Brake disc
- A previous owner had replaced just the rear brake disc. From the factory the bike has Shimano’s fairly basic RT54 in 160mm (suitable only for resin pads). The rear brake disc has been replaced with a Prime rotor which has slotted discs and an alloy spider – it should give better heat dissipation and is metal pad compatible (although I’m still running resin on the rear too). I’m not sure why the difference front and rear – possibly it needed replacing and got upgraded, maybe it was a conscious upgrade, maybe both were upgraded but during wheel changes for sale only one was swapped back to the original wheels.
- Mudguards (fenders)
- The previous owner had SKS Speedrockers for sale separately which had been used with the bike so I bought those and re-fitted them. SKS Speedrockers use straps rather than screw mounting points – the bicycle does have mounting points for screws but these will be quicker and easier to remove/refit once summer comes around so if there’s a spell of wet weather I can just pop them back on.
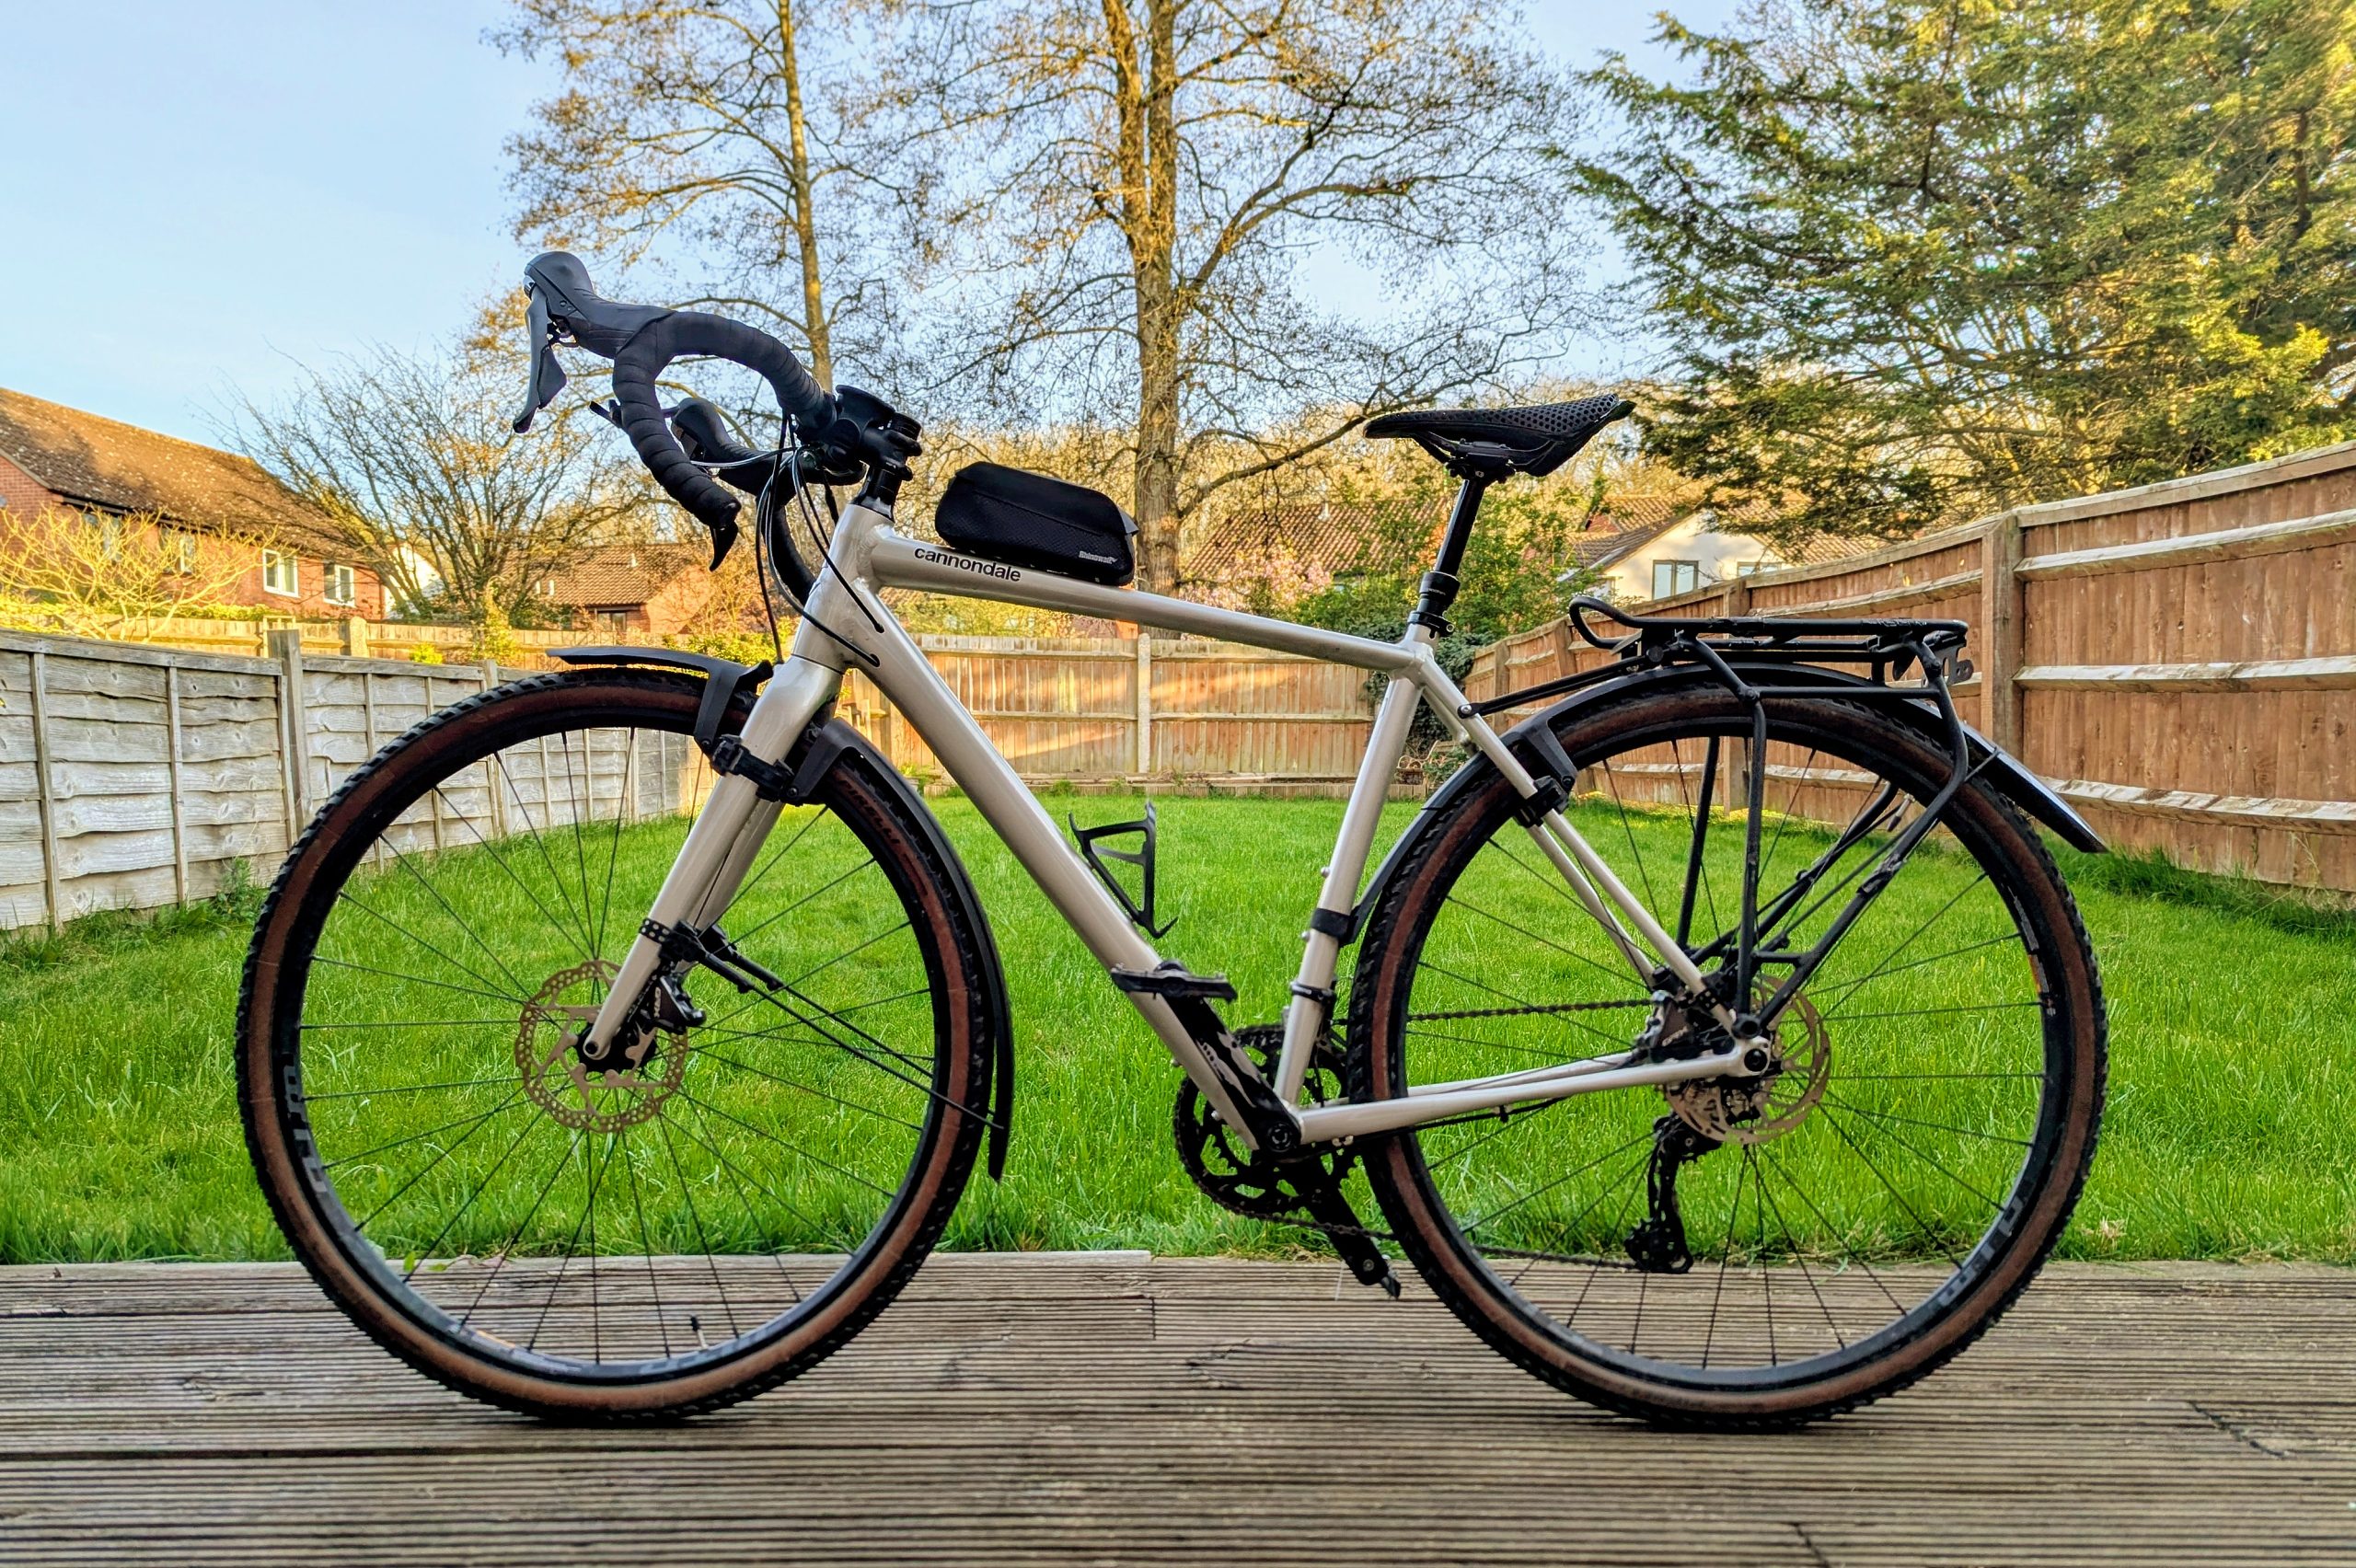
- Pannier rack
- The previous owner had a pannier rack for sale separately which had been used with the bike so I bought it. It’s an Ortlieb Rack Three – a very high quality and sturdy rack capable of handling up to 30kg. It has two levels of rail for conventional side bags (the lower can be used if mounting a separate bag on the top level), but is also compatible with Ortlieb’s QL3/3.1 mounting system and the MIK mounting system (MIK adapter plate needed though for this).
- Top tube bag
- I bought a small Rhinowalk top tube bag to house a small toolkit, minipump and repair patches. On my other bikes I’ve used velcro-attached triangle bags but since the Topstone has screw mounts for a top tube bag it made sense to get one.
- Bottle cage
- It was already fitted with a bottle cage – from a small logo (that’s gloss black on matt black) I was able to figure out it’s a Syncros Tailor Right bottle cage (and an older version of it)
Maintenance/Adjustments
As is usually the case with buying a second-hand bike privately there was a list of things that needed maintenance or adjustment (and some hasty learning about unfamiliar components!). So here’s the list of things soon after buying.
- Brakes
- Worn Pads – One of the rear pads had barely a skin of pad material left, so needed replacing.
- Caliper Centring – That rear pad wear was uneven which signified a lack of centring of the brakes too (in fact both weren’t quite centered) so I recentred them.
- Disc Warped – The front brake disc was slightly warped causing it to rub very slightly. I used a brake disc tool to reverse the warping.
- Wheels
- Trueness – The wheels weren’t entirely true. On a rim-brake bike you’d notice straight away due to brake pad rub, but with disc-brakes it doesn’t stand out. However the 40mm tyres are getting close to the chain stay clearance limit at the back and the out-of-true portion of the rear wheel brought the tyre a bit close so I did some spoke tension adjustments to improve it.
- Hub Bearings – The front wheel hub became a bit rumbly after the first 400 miles with a little bit of lateral play too. On checking the cartridge bearing on the brake disc side felt a bit gritty turning (the other side was fine). I did try picking off the seal and regreasing but it didn’t help (there was some grease residue under the end cap so I wondered if the seal had leaked and/or someone had regreased it before). I did spin the wheel when viewing the bike and I don’t recall it being notably noisy, although I think it did make a little bit of a whirring noise indicating some wear. Having looked at what’s involved in changing cartridge bearings (including the price of bearing presses) I decided to pay a mobile bike mechanic to sort it for me!
- Tyres
- Inner Tubes – It was running tubeless when I bought it. The seller warned me the front tyre was losing pressure within a couple of days. The valve core didn’t seem great so I tried replacing that but felt it was leaking a little around the valve stem too. Having previously learned about the pros/cons of tubeless and based on my typical riding routes I decided to go back to tubed anyway. The tyres were really tough to remove initially – it turns out they were fitted with a foam insert for better seating/rim protection and a consequence of those inserts was making the tyres much harder to remove. Eventually I got the tyres removed and found the sealant entirely dry (likely not topped up for quite some time which explains why the leak hadn’t sealed). I cleaned as much dried sealant off as I could, checked nothing sharp was stuck in them and re-fitted with inner tubes.
- Drivetrain
- Misrouted Chain – Taking the bike out for its first 10 mile ride I thought the drivetrain sounded very noisy. On investigation I found the previous owner must have removed the chain at some point and not routed it properly when refitting as the chain was running over a metal tab on the rear derailleur cage (wearing a groove in the tab). Shimano specifically warn about this issue in their rear derailleur manuals. I rerouted it and it was much quieter.
- Chain Wear – that misrouting of the chain would have likely caused some unusual chain wear and there was also a high chance that the chain was the original anyway so had usual wear. After correcting the misrouting of the chain there was still a little more noise from the drivetrain than I’d expect. The cassette was new when I bought the bike (the seller explained he’d used different wheels and a hub issue had caused damage to the original cassette) so I figured a new chain was indicated. I fitted the same model (a KMC X11SL) and I’m trying Muc-Off dry ceramic lube. As long as I don’t leave it too long before reapplications of the Muc-Off lube the drive train is now pretty quiet.
- Derailleur Trim – It was fairly obvious during the first couple of rides that the front derailleur trim positions were out of alignment. I re-tensioned then cable and then used the adjuster and high screw to sort the alignment (the alignment mark on this mech makes it a lot easier!).
- Pedals – When the weather started to warm up I started to feel a click through the right Shimano flat pedal. I could feel play in the pedal – I assume some wear had loosened the fit of the bearings and the warm weather making the grease thinner didn’t help. I managed to acquire a couple of tools not intended for servicing this type of Shimano pedal, but for much cheaper than the proper Shimano tool, to increase the preload a little which stopped the click. About 100 miles later and the left pedal started clicking audibly so I tightened that one too.
- Bottom Bracket – The previous owner mentioned having greased the bottom bracket to solve a noise. After about 500 miles I started to hear a click when pedaling at cruising load. Having sorted the pedals and checked seat post, seat clamps, etc I surmised it could be the bottom bracket. It’s an FSA BB-4000 (Omega Drive MegaExo) with oversized bearings – the FSA cranks paired with it use a 19mm spindle. The crankset is two piece with a self-extracting bolt so it was relatively easy to remove the crank. The drive side bearing was fine but the other side was very gritty. Having done a bottom bracket swap on my Marin MTB I felt I could swap this one myself, however as I had a mobile bike mechanic coming to do the front wheel hub I had him swap the BB at the same time.
- Handlebar/hoods
- Bar Tape – I was getting a little bit of left little finger tingling during the second and third long rides. The left hood was digging into the palm of my left hand causing a bit of numbness – I found under the cover that the bar tape had been overlapped too much on a corner of the hood so the thicker padded part of the tape was overlapping causing a lump. I was able to work the tape down a bit to stop this happening and that helped with the finger issue.
- Handlebar Rotation, Hood Angle – The handlebars were turned up by a significant angle and the hoods turned in quite a bit. I gather that having the hoods turned in lots is a current trend for an aerodynamic position. After a few rides I wasn’t convinced the setup was suited to me – not least as the drops required quite a wrist angle to use and the levers were hard to reach from the hooks – so I figured a closer-to-neutral position would be a better starting point. I’ve rotated the hoods back out so they’re only slightly turned in and changed the handlebar angle to be only slightly up which does feel better.
- Dropper Control – The bike has been fitted with a dropper post with a cable remote. The remote is positioned on the left hook so it’s possible to ride in the hooks (as there’s enough space for the thumb to curve around between the hood and the remote) and still just enough room left on the drop to fit the left hand for the drops. But the edge/pad of my thumb could easily catch on the lever (especially going over bumps while riding the hooks) – rotating it around the bar seems to have sorted that (and I was able to do it without retaping).
- Stem
- Stem Spacers – When I got the bike it had 3 x 5mm spacers above the stem and one 15mm spacer below (with the bearing top cover below that being 25mm tall). I discovered that Cannondale say you should not have any spacers above the stem with their carbon forks.
- Documentation for the KP017 compression plug (which is 48mm tall, and used on the Topstone 0) states the maximum permitted stack height is 55mm. I assume that Cannondale supply the Topstone 0 with the maximum stack height (and that set of 3x5mm and 1x15mm spacers) – the owner can then reduce the stack height by cutting the carbon steerer and removing spacers.
- The warning about not having any spacers above the stem relates to the height of that compression plug – the lower stem bolt needs to fully overlap with the expanding part of the compression plug to brace the steerer against both the clamping force and the forces acting on the stem through the handlebars. Apparently the upper stem bolt doesn’t need to be braced in the same way as it doesn’t experience the same level of force. There are taller third party compression plugs for more flexibility in stem location.
- I assume a previous owner was either not being aware of Cannondale’s warning or ignoring it when he decided to lower the stem by just moving spacers above it. The lower stem bolt still had 6mm of overlap with the compression plug which probably meant the risk of damage was minimal (the steerer tube looked fine under the stem when I removed it), however it was not ideal.
- As I was wanting to raise the handlebars anyway it was a no-brainer to simply revert to having the spacers below the stem. Note that I kept finding that a few miles after re-doing the preload and stem bolts I’d get clicking from the stem clamp area when loading/unloading the handlebars. After re-doing it a few times in case it was a problem with preload or stem/steerer interface (with no improvement) I realised that after torquing the stem bolts the top cap was became looser than when I’d set the preload. The underside of this FSA top cap is curved and the top of the stem has a curve too. Doing up the stem bolts would pull the top of the stem inwards and due to both curved surfaces I believe this was creating a tiny gap. Snugging up the top cap after doing the stem bolts seems to have sorted the issue.
- Stem Spacers – When I got the bike it had 3 x 5mm spacers above the stem and one 15mm spacer below (with the bearing top cover below that being 25mm tall). I discovered that Cannondale say you should not have any spacers above the stem with their carbon forks.
- Dropper Post
- As I figured it probably hadn’t had any maintenance I unscrewed the collar and seal on the post and greased the inner post with suspension fork grease. I rarely use the dropper so it shouldn’t need greasing again for some time.
- I started getting a set of clicks when cycling hard primarily out of the seat (not really when in the seat). I initially thought it was maybe the stem, but I ruled that out. I checked the pannier bolts, they were fine. Pedals were new. I assumed not the seat post as I’d done that up well the last time I adjusted it and it was primarily happening when I was pedalling hard out of the saddle and wasn’t happening just moving my weight around on the seat. The bottom bracket had been replaced by a bike mechanic so it shouldn’t have been that, but I checked the cups were torqued up just in case something had settled but no luck. It wasn’t the internally routed cables moving. I struggled to reproduce it statically but did think it was something related to frame flex under load. In trying different ways to flex the frame I tried gripping the top tube and pulling/pushing sideways on the seatpost and lo and behold I got the clicks – so my assumption about it not being seatpost because it was happening out of the saddle was incorrect! I regreased the clamping collar, the clamping bolt and the dropper tube where it slotted into the frame and retorqued the clamp bolt and that seemed to sort it. Well, the noise came back a little after 10 miles and again I could provoke it (to a lesser degree) with the same pulling but loosening and retorqueing the clamp bolt stopped it and after 20 miles the noise stayed away.
Parts Notes
I’ve found that the information on some parts to be hard to find (or inaccurate!).
- Bottom Bracket
- Cannondale’s page on the Topstone 0 claims the bottom bracket is a “Shimano BBRS500” which is wrong. The Topstone 0 uses and FSA Omega crank which has a 19mm spindle so it is paired with a matching FSA BB-4000 bottom bracket.
- Headset Compression Plug
- Sellers of Cannondale spares, including an authorised UK Cannondale dealer, list the compression plug as being the K35009. It’s visually obvious from the top cap on my bike (which is the same as in the photos on Cannodale’s page about the Topstone 0) that this is not what was originally used. The KP017 is what was originally fitted, however his has been discontinued and the K35009 replaced it hence it being the listed spare.
- Note that on my bike I was initially confused when moving spacers that I could feel no hex recess for the expander bolt below the top cap. Upon removing the top cap I could see something black slightly proud of the central metal collar – my best guess is that when the compression plug was originally fitted once it was correctly positioned and the expander bolt set a plastic blanking plug was inserted to cover the expander bolt and to prevent being able to easily loosen the compression plug. I’ve not tried removing it though (I’ve only unscrewed the top cap) so I can’t be 100% sure.
- Wheel Bearings
- The original wheels use WTB KOM Light i23 TCS 28h rims with Formula hubs (12x100mm centerlock front, 12x142mm centerlock rear). The cartridge bearings used on the front, as measured by the bike mechanic who replaced mine, are code MR 18307 (18mm ID, 30mm OD, 7mm W) and are double sealed (so LLB, LLU, 2RS). I don’t know what’s used on the rear yet as those bearings are currently fine (I gather it’s common for rear wheel bearings to be a different size to the front).