Here’s a bit about the photography kit I use. I’ve mostly been a Nikon user – but that’s not down to having any belief that Nikon is necessarily any better than Canon (or indeed any other camera make), but purely because my partner already had a Nikon DSLR when I got mine so it made sense to be able to share lenses and have a familiar camera UI.
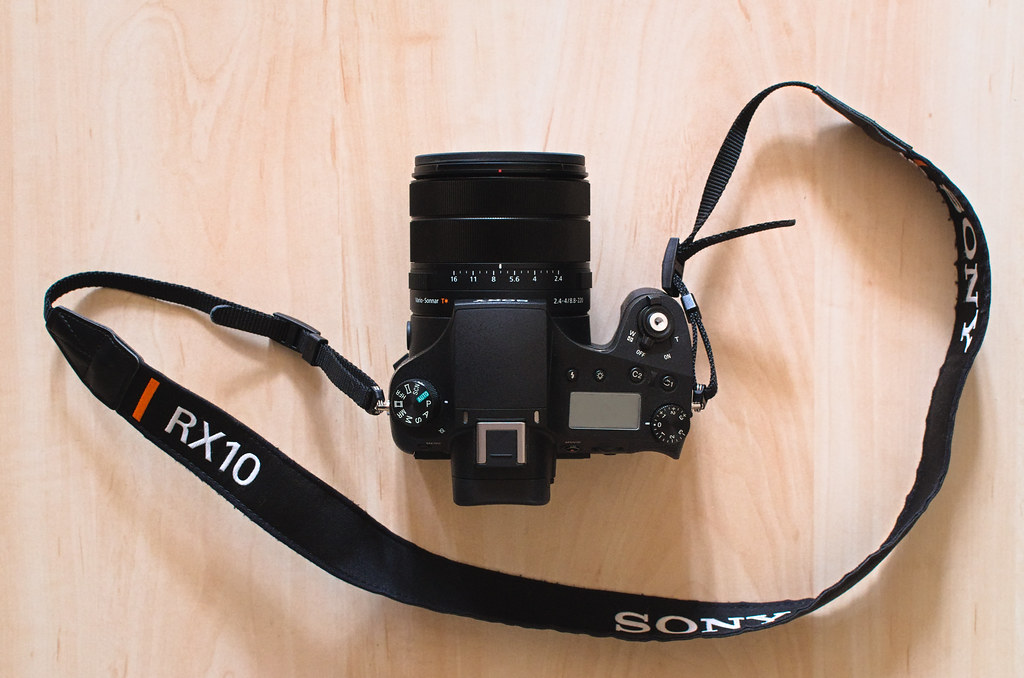
Bridge Camera
Sony DSC-RX10M4
This camera, purchased towards the end of November 2019, is what I now use most of the time (with my Nikon D7000 falling into disuse as a result). it has a 24-600mm (35mm equivalent) F2.4-4 zoom lens (with optical stabilisation) and a 20 megapixel sensor. The specifications say it can auto-focus in 0.03-sec (using 315 focal-plane phase-detection auto-focus points) and it can shoot 24 continuous still frames a second.
You can read my rationale for purchasing it, despite the D7000 still being an excellent camera, on my page about my interest in photography.
DSLR Camera Body
Nikon D7000
This is the third DSLR body I’ve owned and one that I’m likely to stick with for a few more years, especially now I have the Sony DSC-RX10. My first DSLR was a Nikon D60, then after a while I traded up to a D90 and then again after a little while longer to a D7000.
DSLR Camera Auto Focus Lenses
Nikon AF-S Nikkor 35mm f/1.8G DX
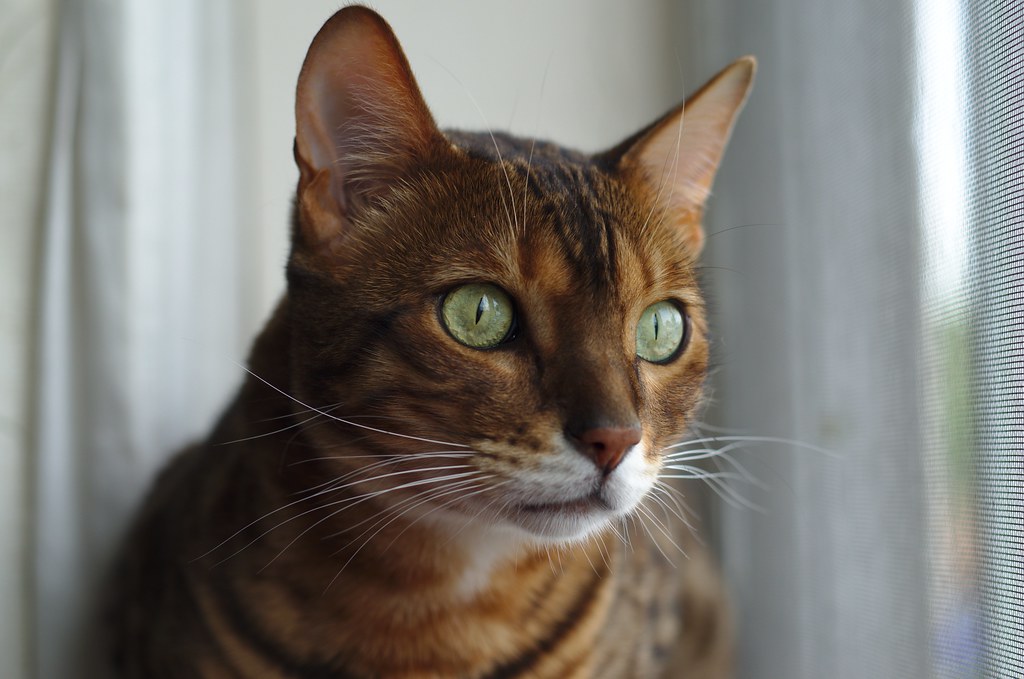
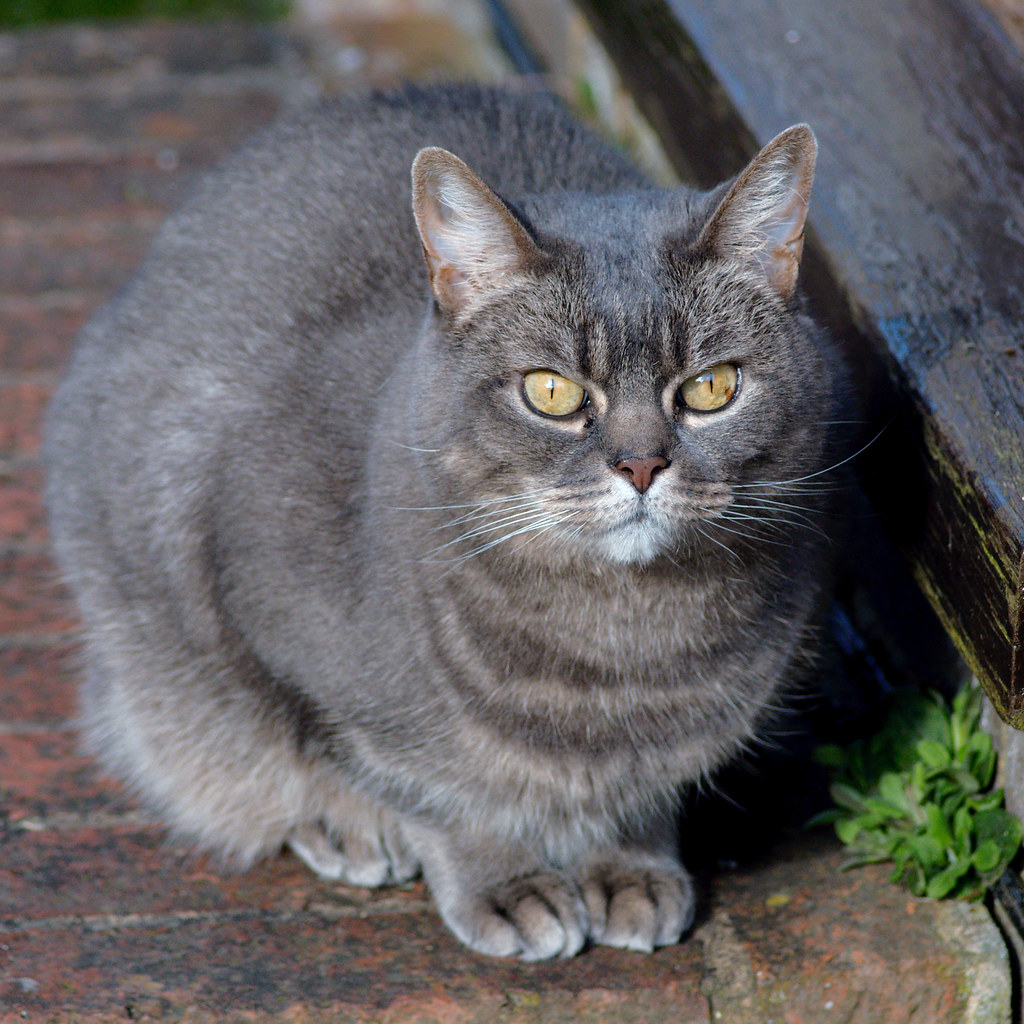
This is the second prime lens I bought (see below about the 50mm, which was my first). It’s a more comfortable focal length than 50mm on the crop sensor bodies I’ve owned and is quicker and quieter too being AF-S. Although the Sigma 24-70mm f2.8 lens I now own is more convenient, I still make good use of the 35mm for its superior sharpness and wider aperture. It does suffer a bit with longitudinal chromatic aberrations (LoCA) when wide open which cat whiskers seem to be good at showing up!
Nikon AF Nikkor 50mm f/1.8D
When I got my first DSLR I knew that I wanted a prime lens for it as a companion to the kit lens as I’d seen the quality of shots my partner had achieved with prime lenses on a film Nikon compared to zoom lenses. Because I wasn’t 100% sure how much I’d really get into photography I didn’t want to spend too much on a prime lens. I’d read that this trusty 50mm was excellent value for money. I knew it wouldn’t auto-focus on my D60 (as the D60 lacks the screw drive for AF-D lenses), but knew it would meter and that the D60 would be able to provide an electronic rangefinder to help with manual focussing. Although I now have the 35mm f/1.8 AF-S lens as well, I still use the 50mm sometimes.
Tamron SP AF 90mm f/2.8 Macro
This can be used for portraits, although 90mm on DX means you won’t be terribly close to the subject (on full frame it’s a bit more useful for that). It’s really aimed at macro work though, offering 1:1 maximum magnification. I didn’t have enough need for a macro lens to justify buying a decent one new, but some patient watching of listings of used lenses on e-bay and I was lucky to get this one, which is in great working condition, at a decent price.
Sigma 24-70mm f/2.8 EX DG
My go-to lens for anything that doesn’t need a long zoom. Useful for cat photography, nature, car shows, etc etc. Lenses of this type are often called “walk-around” lenses. On DX the wide end is a little long though. Back when I was first looking for a constant f2.8 walk-around lens the choices were mostly in this sort of zoom range – these days there are more choices with zoom ranges such as 17-55mm, and if I was shopping now I’d probably go for something more in that range!
Nikon AF-S Nikkor 18-200mm f/3.5-5.6G ED DX VR
I bought my first DSLR with a kit lens, as you’d expect. I wanted to wait until I was sure photography was a hobby I would enjoy before splashing out on any more expensive lenses. The kit lens was somewhat limited though so it wasn’t long before I gave in to temptation to get this versatile lens. A decent range, reasonable performance and stabilisation – it’s a good all round lens. I don’t use it much these days as I tend to use the pairing of the 24-70mm f2.8 and the 70-300mm f/4.5-5.6 most of the time, however it is useful if I want to take a small kit bag (as the 70-300mm is big) or am in a situation where I don’t want to be juggling lenses between near and distant ranges or need the range but can only take one lens. I also use it when I need something wider than 24mm as I have nothing else in that range at the moment.
Nikon AF-S Nikkor 70-300mm f/4.5-5.6G ED VR II
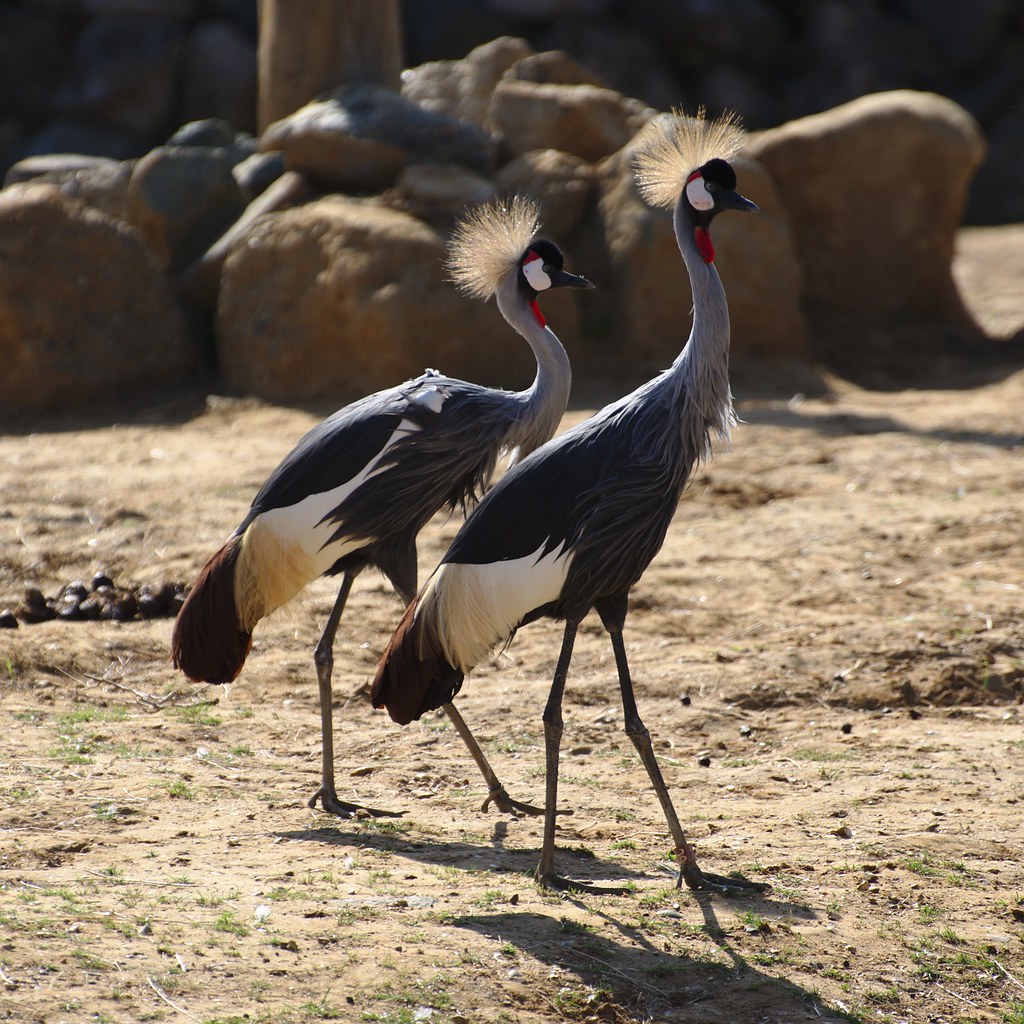
Although I had the 18-200mm to give me a reasonably long reach (especially on a crop sensor body), once I’d bought the 24-70mm f2.8 lens I was using that most of the time and wondered if something like the 70-300mm would be a better companion for the times when I did need a longer reach than 70mm. Everything I read about this lens was pretty positive – less compromised IQ than the 18-200mm due to not having to cover as greater range, improved VR, better auto-focus, and a little more reach at the long end. As an affordable long zoom I was pretty happy with it – I could still fit the camera in my bag with the lens mounted, and it’s not heavy enough for me to need a monopod or gorilla arms. On the right you can see a sample photo I took with this lens at f/5.6 and ~250mm (full res version on flickr here).
Sigma 70-200mm f/2.8 EX DG OS HSM
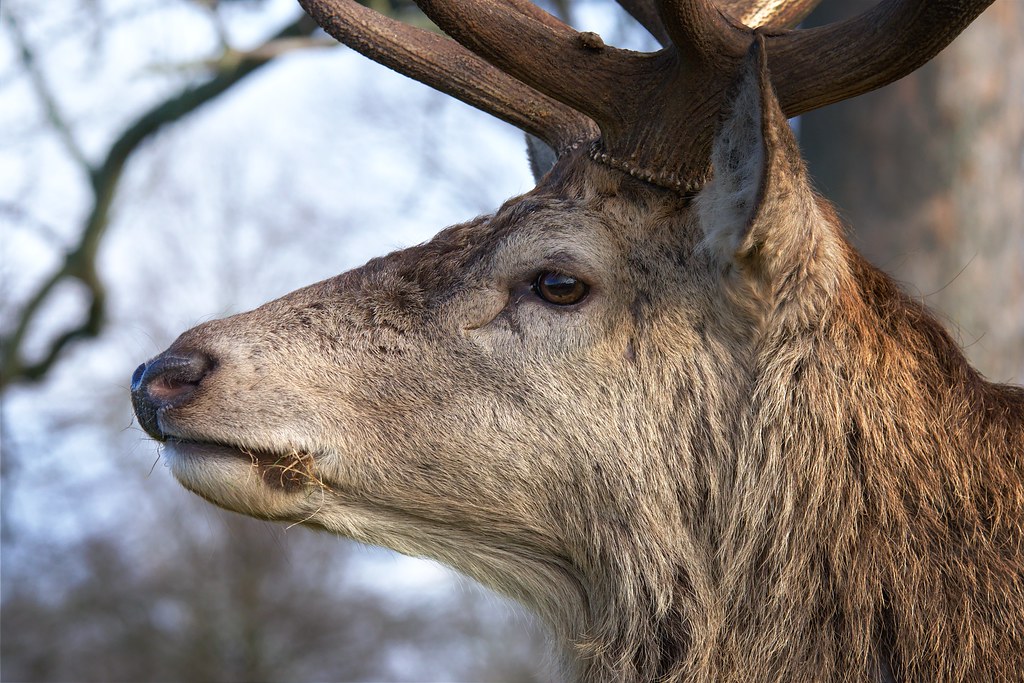
As I found myself taken more photos at a distance and/or through enclosure cages/fences and not always in the best of light I did find the the Nikkor 70-300mm wasn’t always performing quite as well as I hoped. I decided to buy this Sigma lens to give me the capability of a nice fast f/2.8 throughout its zoom range. Not quite as long as the 300mm on the Nikkor lens, but slightly sharper (albeit needing a little stopping down). On the right you can see a photo of one of the relaxed deer at Bushy Park which I took using this lens at f/7.0 and 140mm (full res version on flickr here).
DSLR – Manual Focus Lenses
I don’t use the manual lenses much – I’d read about the Vivitar Series 1 as being able to get some lovely results, as well as being inexpensive if you get lucky on ebay, so I thought I’d give one a punt. The first one (which is a version 1) I got was part of a very cheap lot of basically old junky camera bits of questionable state – and that’s how I acquired the Mitakon 25mm and Nikon 50mm Series E as well. Unfortunately it has a bit of a scratch on the front element which does show up if you stop down and the action on it isn’t great. All 3 lenses were suffering from internal dust, haze and fungus, so as they were cheap I had a go at taking them apart and cleaning them. Not all the elements could be separated, but I did improve them to the point of them being usable at least. The version 2 of the Vivitar I bought on its own, for a bit more than the box of bits, and arrived in better condition (not perfect, but decent for its age). The D7000 has an aperture coupling ring which means it can meter with these lenses – when I first got them I had my D90 which doesn’t.
Mitakon 24mm f/2.5

This is a small wide-ish angle prime lens with metal construction. It’s actually not too bad for sharpness with the aperture wide open, although on my D7000 it back-focuses a bit (and you can’t dial in focus compensation for manual lenses) which I have to try remember when using the focus indicator! On the right you can pop-up a sample photo I took with this lens wide open at f/2.5 (full res photo on flickr from here).
Nikon 50mm f/1.8 Series E
Physically, this is a ridiculously small lens – it’s nicknamed a “pancake” lens for that reason. It seems to perform well and has a great reputation, but it doesn’t offer me any real benefit over the 50mm f/1.8D (and has the downside that I have to manually focus on it, of course) so I only use it to play once in a while. On the right you can pop-up a sample photo I took with this lens, although stopped down to f/2.8 rather than wide open (full res photo on flickr from here).
Vivitar Series 1 70-210mm f/3.5 (version 1, Kiron made)
The earlier versions of the Series 1 70-210mm lens have a great reputation as high quality zoom for anyone who doesn’t mind a manual lens. Although I had my Nikon 18-200mm lens which was ok as a zoom, I was interested in seeing if I could get a zoom with a shallower depth of field and nicer bokeh on a budget. This was the first example I bought, but it was a bit of a punt it as it was part of a box of old camera junk someone was getting rid of via e-bay (although at a bargain basement price). Unfortunately it turned out to be somewhat grotty – fungus and dust inside on a number of elements, and a 2cm scratch on the front element. Rather than just bin it I did have a go at taking it apart and cleaned up some of the elements, and didn’t do too badly. It’s still compromised because of the scratch and condition, but it does work. On the right you can pop-up a sample photo I took with this lens stopped down to f/8 (I can’t remember what I was zoomed at though – full res version of the photo on flickr here).
Vivitar Series 1 70-210mm f/3.5 (version 2, Tokina made)
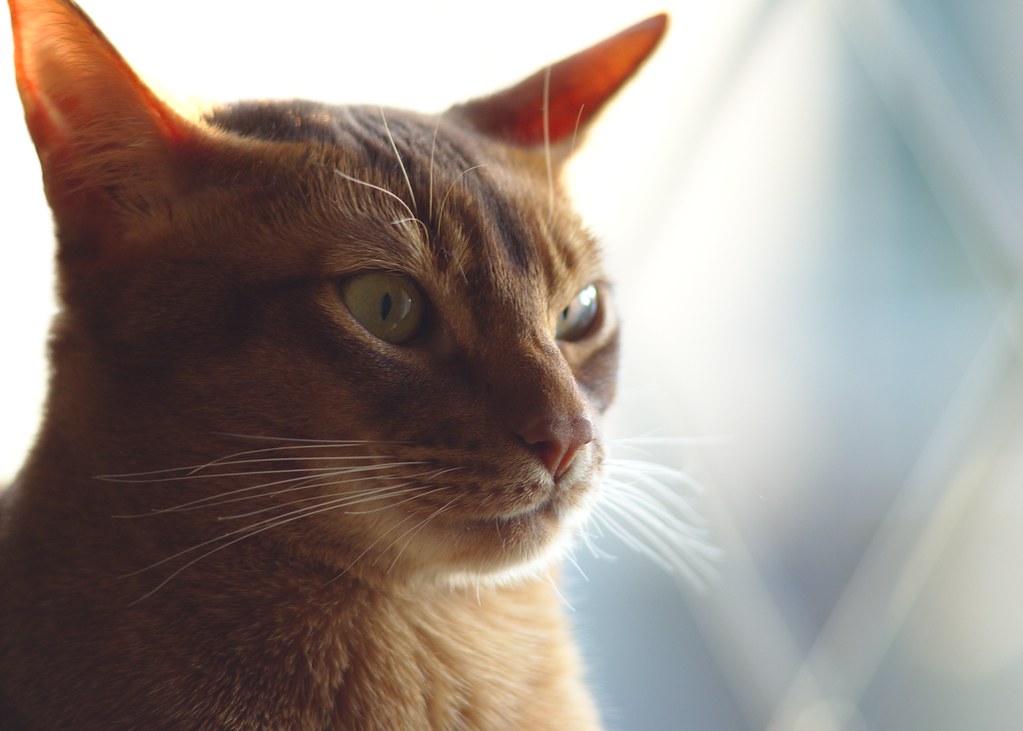
This is the second version of this lens. I think I paid about £25 for a decent condition copy of this lens via ebay a couple of years ago (with some signs of wear, but relatively clean internally and in its original box). The version 2 lacks the macro mode of the version 1, but is simpler mechanically as a result and slightly lighter too. From what I’ve read this is generally considered to be sharper than the first version made by Kiron. On the right you can pop-up a sample photo I took with this lens of Theo against the bright light from the window (taken wide open at f/3.5, but I can’t remember what the zoom was at – full res photo on flickr from here).
Software
It wasn’t long after I got my first DSLR, the Nikon D60, that I started shooting in RAW to give more scope for adjustments in post-processing while minimising loss of quality. At first I’d shoot in RAW+JPG so I could see what the camera was doing with the JPGs to give me an idea. For a few years now I’ve only shot in RAW though. The adjustments made in processing that RAW file to JPG, time in the “digital darkroom”, is an important part of my process. Also, for some reason I struggle a bit with framing through the camera view finder, so I usually crop my images from what I took with the camera (even if it’s just a little).
For many years I’ve been a Linux user (originally Debian, then Ubuntu and more recently Mint) which does restrict my choice of software in some ways as some popular tools can’t be run natively under Linux.
The first stage in processing from RAW to JPG is best done in non-destructive photo processing tools such as darktable, Aftershot Pro, Lightroom, etc. These tools allow you to create a set of “adjustments” which are used to convert the RAW into JPG, adjusting things like tone curves, white balance, sharpness and more. Because they are non-destructive and display the set of adjustments currently in use you can easily tweak and hone the adjustments if you’re not quite happy with the final results (unlike using image editing software where it actually changes the layer or image when you make an adjustment, so you have to undo and make the change again if you want to do it slightly differently).
darktable
At the moment I primarily use darktable to post-process my photos from RAW to JPG. It’s free, open source and runs on Linux. More importantly, it’s actually really good! Previously I used Aftershot Pro (originally called Bibble), but some question marks over the future of Aftershot Pro lead to me looking alternatives. For a while all of the alternatives on Linux lacked local adjustments, a feature which ASP has and I make a lot of use of, but darktable gained that ability at some point (through masks).

It has a good variety of modules available for providing all sorts of adjustments such as tone curves, noise reduction, sharpening, white balance, local contrast, vignette, graduated density, spot removal, colour zones and more. As noted above there’s the ability to perform local adjustments too (apply a set of adjustments just to specific portions of the image) – I find this particularly useful for balancing the light in an image if some regions are too bright or too dark, or else giving a bit more texture to the light if it’s a bit flat (in fact as well as being to use draw masks to localise adjustments you can apply parametric masks as well to affect e.g. only the brightest or darkest pixels are affected).
Darktable has been a little behind in support for the RX10M4. It shares the lens with the RX10M3 and its sensor with a couple of the versions of the more compact RX100 , so I clone some of the profile settings on my local installation so it would pick those up for use with photos taken with the RX10. The noise reduction at higher ISO seems to require a lot of fiddling with the settings to get half-way decent results.
RawTherapee
Out of frustration with the noise reduction in darktable with the RX10 I gave RawTherapee a closer look (I’d briefly tried it in the past but found the lack of local adjustments meant there was no compelling reason to use it instead of darktable). It was much quicker to get fairly decent noise reduction on photos from my RX10 than darktable (however the anisotropic filter in GIMP is often needed as a final pass to get rid of grain) . I still primarily use darktable but have found myself using RawTherapee for higher iso images, or sometimes just for ease of use of its exposure module or else to play with its film simulation module.
Aftershot Pro
Originally called Bibble prior to being bought up by Corel, this commercial piece of software was my main post-processing tool for the first few years of DSLR ownership. It was (and still is) a great piece of software – for a while it was the only serious option for Linux users (even back since the Bibble 4 days I know it was available on Windows, Mac and Linux). At some point in its life it gained “Layers” – the ability to add layers with masks to localise sets of adjustments to specific regions of an image, which I’ve always found to be really useful (especially as I mostly take photos in circumstances where I can’t control the light). It had a decent community of plugin authors as well. It lots its way a little bit in the initial period after Corel acquired it, which is why I started using darktable (there was a long period of very little happening with it and not much information coming out of Corel) – Corel are back on track with it now and it’s back to receiving regular updates, but I’ve become used to darktable and slightly prefer darktable (there’s not much in it though).
GNU Image Manipulation Program (GIMP)
Prior to acquiring a DSLR my image editing was all done in GIMP. It’s a well known piece of image editing software for Linux and although it doesn’t have the most intuitive of UIs it’s still pretty powerful. It’s pretty much limited to 8-bit at present (they’ve been working on remedying that for a while now, and it’s still not there), and as I noted earlier image editing software is “destructive” in that an adjustment actually changes the layer you’re working on such that you can’t tweak the adjustment without undoing it. For that reason once I got a DSLR and started shooting in RAW I began to use photo processing tools on my RAW files rather than GIMP. I still use GIMP though – the photo processing tools don’t allow you to do complex cloning, and there are a few filters in GIMP (particularly in the GMIC set of plugins) which I occasionally find useful and don’t have a suitable equivalent in darktable or ASP.
Other Kit
Lighting
I have two flashguns – a Nikon SB-600 and a Yongnuo YN565EX. I purchased the Nikon SB-600 first, so have most experience with that. I didn’t want to spend too much on a flash, but on the other hand I wanted to go for one which could be commanded remotely by my camera body using Nikon’s CLS so as to be able to use off-camera flash, so my choice at the time was basically the SB-600. The frustrations of being limited by a single flash lead to me looking at a second flash – several third party flashes now came with support for Nikon’s CLS, and based on reviews and its price I thought I’d give the Yongnuo YN565EX a go. I’m not experienced enough with flash usage to give a decent review of it really, beyond saying it works :).
I’m finding that Nikon’s CLS is working well enough for my needs – at the moment as the flash guns are always positioned to be able to pick up the commands from the camera. I have a guess at the compensation levels to use for the two flashes, take a test shot or two, and adjust.
For controlling the light I have two silvered umbrellas and a white umbrella, as well as grid and some gels.
The limited space in my current home is rather inconvenient for doing much in the way of flash photography with my cats, so I haven’t gotten as much use out of the kit as I’d like!
Lens Filters
The main type of filter I use is a circular polariser (CPL) and primarily when doing car photography. It can be useful for being able to cut or diminish some reflections from the car bodywork or windscreen where the reflections are distracting. Clear plastics on the cars can show up rainbow patterns through the polariser which are due to stress patterns in the plastics – the clear polycarbonate in front of headlamps often show these up unfortunately!
I also have some graduated neutral-density filters. Although I can, for example, balance the brightness of a sky with a darker foreground in post-processing the drawback of doing that is I need to expose for the sky to avoid losing detail due to blown highlights and the quality of the foreground will suffer doing shadow recovery. So if it’s possible to use a graduated filter to bring the sky closer to the foreground the result will be better quality.
Prior to buying a macro lens I also purchased a cheap set of macro filters for my 50mm lens – the end results aren’t as good as a macro lens, but were ok.
I do also have some UV filters which I use as lens protectors in some circumstances!
Miscellaneous
Infrared remote trigger, monopod, several tripods, lowepro slingback bag, air blower, cleaning pads/fluid.